


webrtc对等连接
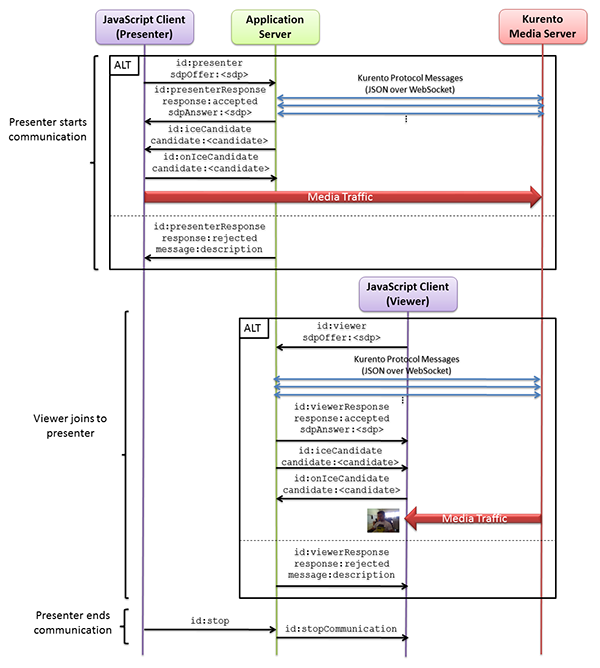
- ClientA注册,ClientB注册.
- ClientA创建SdpOffer,成功后调用setLocalDescription()设置为本地描述.
- ClientA发起Call,将SdpOffer发送给信令服务器.
- ClientB接收到请求(incomingCall),ClientB接受后配置本地媒体数据.
- ClientB创建SdpOffer,成功后调用setLocalDescription()设置为本地描述.
- ClientB发起incomingCallResponse,将sdpOffer发送给信令服务器.
- ClientB接收到startCommunication,调用setRemoteDescription将SdpAnswer设置为远程描述,ClientB已经获知连接双方的配置.
- ClientA接收到callResponse,调用setRemoteDescription将SdpAnswer设置为远程描述,ClientA已经获知连接双方的配置.
信令主要流程图

引入库
    implementation 'org.webrtc:google-webrtc:1.0.32006'
    implementation 'org.java-websocket:Java-WebSocket:1.5.3'
    implementation "com.google.code.gson:gson:2.+"
初始化PeerConnectionFactory
PeerConnectionFactory.initialize(
            PeerConnectionFactory.InitializationOptions.builder(
                this.applicationContext
            )
                .setFieldTrials("WebRTC-H264HighProfile/Enabled/")
                .setEnableInternalTracer(true)
                .createInitializationOptions()
        )
创建PeerConnecitonFactory
val encoderFactory = DefaultVideoEncoderFactory(bglBase.eglBaseContext, true, true)
            val decoderFactory = DefaultVideoDecoderFactory(bglBase.eglBaseContext)
            peerConnectionFactory = PeerConnectionFactory.builder()
                .setVideoEncoderFactory(encoderFactory)
                .setVideoDecoderFactory(decoderFactory)
                .createPeerConnectionFactory()
创建PeerConnection
            val peerConnectionFactory = createPeerConnectionFactory()
            // 配置STUN穿透服务器  转发服务器
            val iceServers = ArrayList<PeerConnection.IceServer>()
            val iceServer: PeerConnection.IceServer =
                PeerConnection.IceServer.builder(Config.STUN).createIceServer()
            iceServers.add(iceServer)

//            streamList = ArrayList()

            val configuration = PeerConnection.RTCConfiguration(iceServers)
            peerConnection = peerConnectionFactory.createPeerConnection(configuration, this)
    }
在Observer.onIceCandidate响应时,将信息发送给服务端
override fun onIceCandidate(iceCandidate: IceCandidate?) {
        //发送IceCandidate
        sendIceCandidate(iceCandidate)
    }
在OnMessage接收到iceCandidate添加到peerConnection
peerConnection.addIceCandidate(iceCandidate)初始化WebSocketClient
val webSocketClient=object :WebSocketClient(URI.create(Config.URL)){
            override fun onOpen(handshakedata: ServerHandshake?) {
                 Log.i(TAG, "WebSocket连接成功")
            }

            override fun onMessage(message: String?) {
                Log.e(
                    TAG, "######## onMessage ########\n$message"
                )
                val jsonObject = Gson().fromJson(message, JsonObject::class.java)
                when (jsonObject["id"].asString) {
                    REGISTER_RESPONSE -> {
                        // 注册回应
                    }
                    INCOMING_CALL -> {
                        //来电
                    }
                    CALL_RESPONSE -> {
                        //呼叫回应
                    }
                    START_COMMUNICATION -> {
                        //开始通迅
                    }
                    STOP_COMMUNICATION->{
                        //停止通迅
                    }
                    ICE_CANDIDATE -> {
                        //接收到IceCandidate后调用addIceCandidate
                    }
                }
            }

            override fun onClose(code: Int, reason: String?, remote: Boolean) {
                Log.i(TAG, "onClose code=$code reason=$reason remote=$remote")
            }

            override fun onError(ex: Exception?) {
                ex?.printStackTrace()
            }
        }
通过PeerConnectionFactory创建数据源VideoTrack/AudioTrack
准备摄像头,是否有前置摄像头,如果有就用前置摄像头:
private fun createCameraCapturer(enumerator: CameraEnumerator): VideoCapturer? {
        val deviceNames = enumerator.deviceNames
        // First, try to find front facing camera
        Log.d(TAG, "Looking for front facing cameras.")
        for (deviceName in deviceNames) {
            if (enumerator.isFrontFacing(deviceName)) {
                Logging.d(TAG, "Creating front facing camera capturer.")
                val videoCapturer: VideoCapturer? = enumerator.createCapturer(deviceName, null)
                if (videoCapturer != null) {
                    return videoCapturer
                }
            }
        }
        // Front facing camera not found, try something else
        Log.d(TAG, "Looking for other cameras.")
        for (deviceName in deviceNames) {
            if (!enumerator.isFrontFacing(deviceName)) {
                Logging.d(TAG, "Creating other camera capturer.")
                val videoCapturer: VideoCapturer? = enumerator.createCapturer(deviceName, null)
                if (videoCapturer != null) {
                    return videoCapturer
                }
            }
        }
        return null
    }
在Android系统下有两种Camera,一种称为 Camera1,是一种比较老的采集视频数据的方式,别一种称为Camera2,是一种新的采集视频的方法。它们之间的最大区别是Camera1使用同步方式调用API,Camera2使用异步方式,所以Camera2更高效。这里如果支持Camera2就使用Camera2, 如果不支持就使用Camera1。
    private fun createVideoCapturer(): VideoCapturer {
        return if (Camera2Enumerator.isSupported(this)) {
            createCameraCapturer(Camera2Enumerator(this))!!
        } else {
            createCameraCapturer(Camera1Enumerator(true))!!
        }
    }
配置视频数据源VideoTrack
        val videoSource = peerConnectionFactory.createVideoSource(true)
        val surfaceTextureHelper = SurfaceTextureHelper.create(
            Thread.currentThread().name,
            eglBase().eglBaseContext
        )
        val videoCapturer: VideoCapturer = createVideoCapturer()
        //将videoCapturer与videoSource绑定在一起
        videoCapturer.initialize(
            surfaceTextureHelper,
            this.applicationContext,
            videoSource.capturerObserver
        )
        //调用startCapture打开摄像头
        videoCapturer.startCapture(
            Config.VIDEO_RESOLUTION_WIDTH,
            Config.VIDEO_RESOLUTION_HEIGHT,
            Config.VIDEO_FPS
        )

        val videoTrack = peerConnectionFactory.createVideoTrack(Config.VIDEO_TRACK_ID, videoSource)
        videoTrack.setEnabled(true)
        videoTrack.addSink(localSurfaceView)
配置音频数据源AudioTrack
        val audioConstraints = MediaConstraints()
        //回声消除
        audioConstraints.mandatory.add(
            MediaConstraints.KeyValuePair(
                "googEchoCancellation",
                "true"
            )
        )
        //自动增益
        audioConstraints.mandatory.add(MediaConstraints.KeyValuePair("googAutoGainControl", "true"))
        //高音过滤
        audioConstraints.mandatory.add(MediaConstraints.KeyValuePair("googHighpassFilter", "true"))
        //噪音处理
        audioConstraints.mandatory.add(
            MediaConstraints.KeyValuePair(
                "googNoiseSuppression",
                "true"
            )
        )
        val audioSource = peerConnectionFactory.createAudioSource(audioConstraints)
        val audioTrack = peerConnectionFactory.createAudioTrack(Config.AUDIO_TRACK_ID, audioSource)
添加音视频到MediaStream
val medisStream = peerConnectionFactory.createLocalMediaStream("local_stream")
medisStream.addTrack(audioTrack)
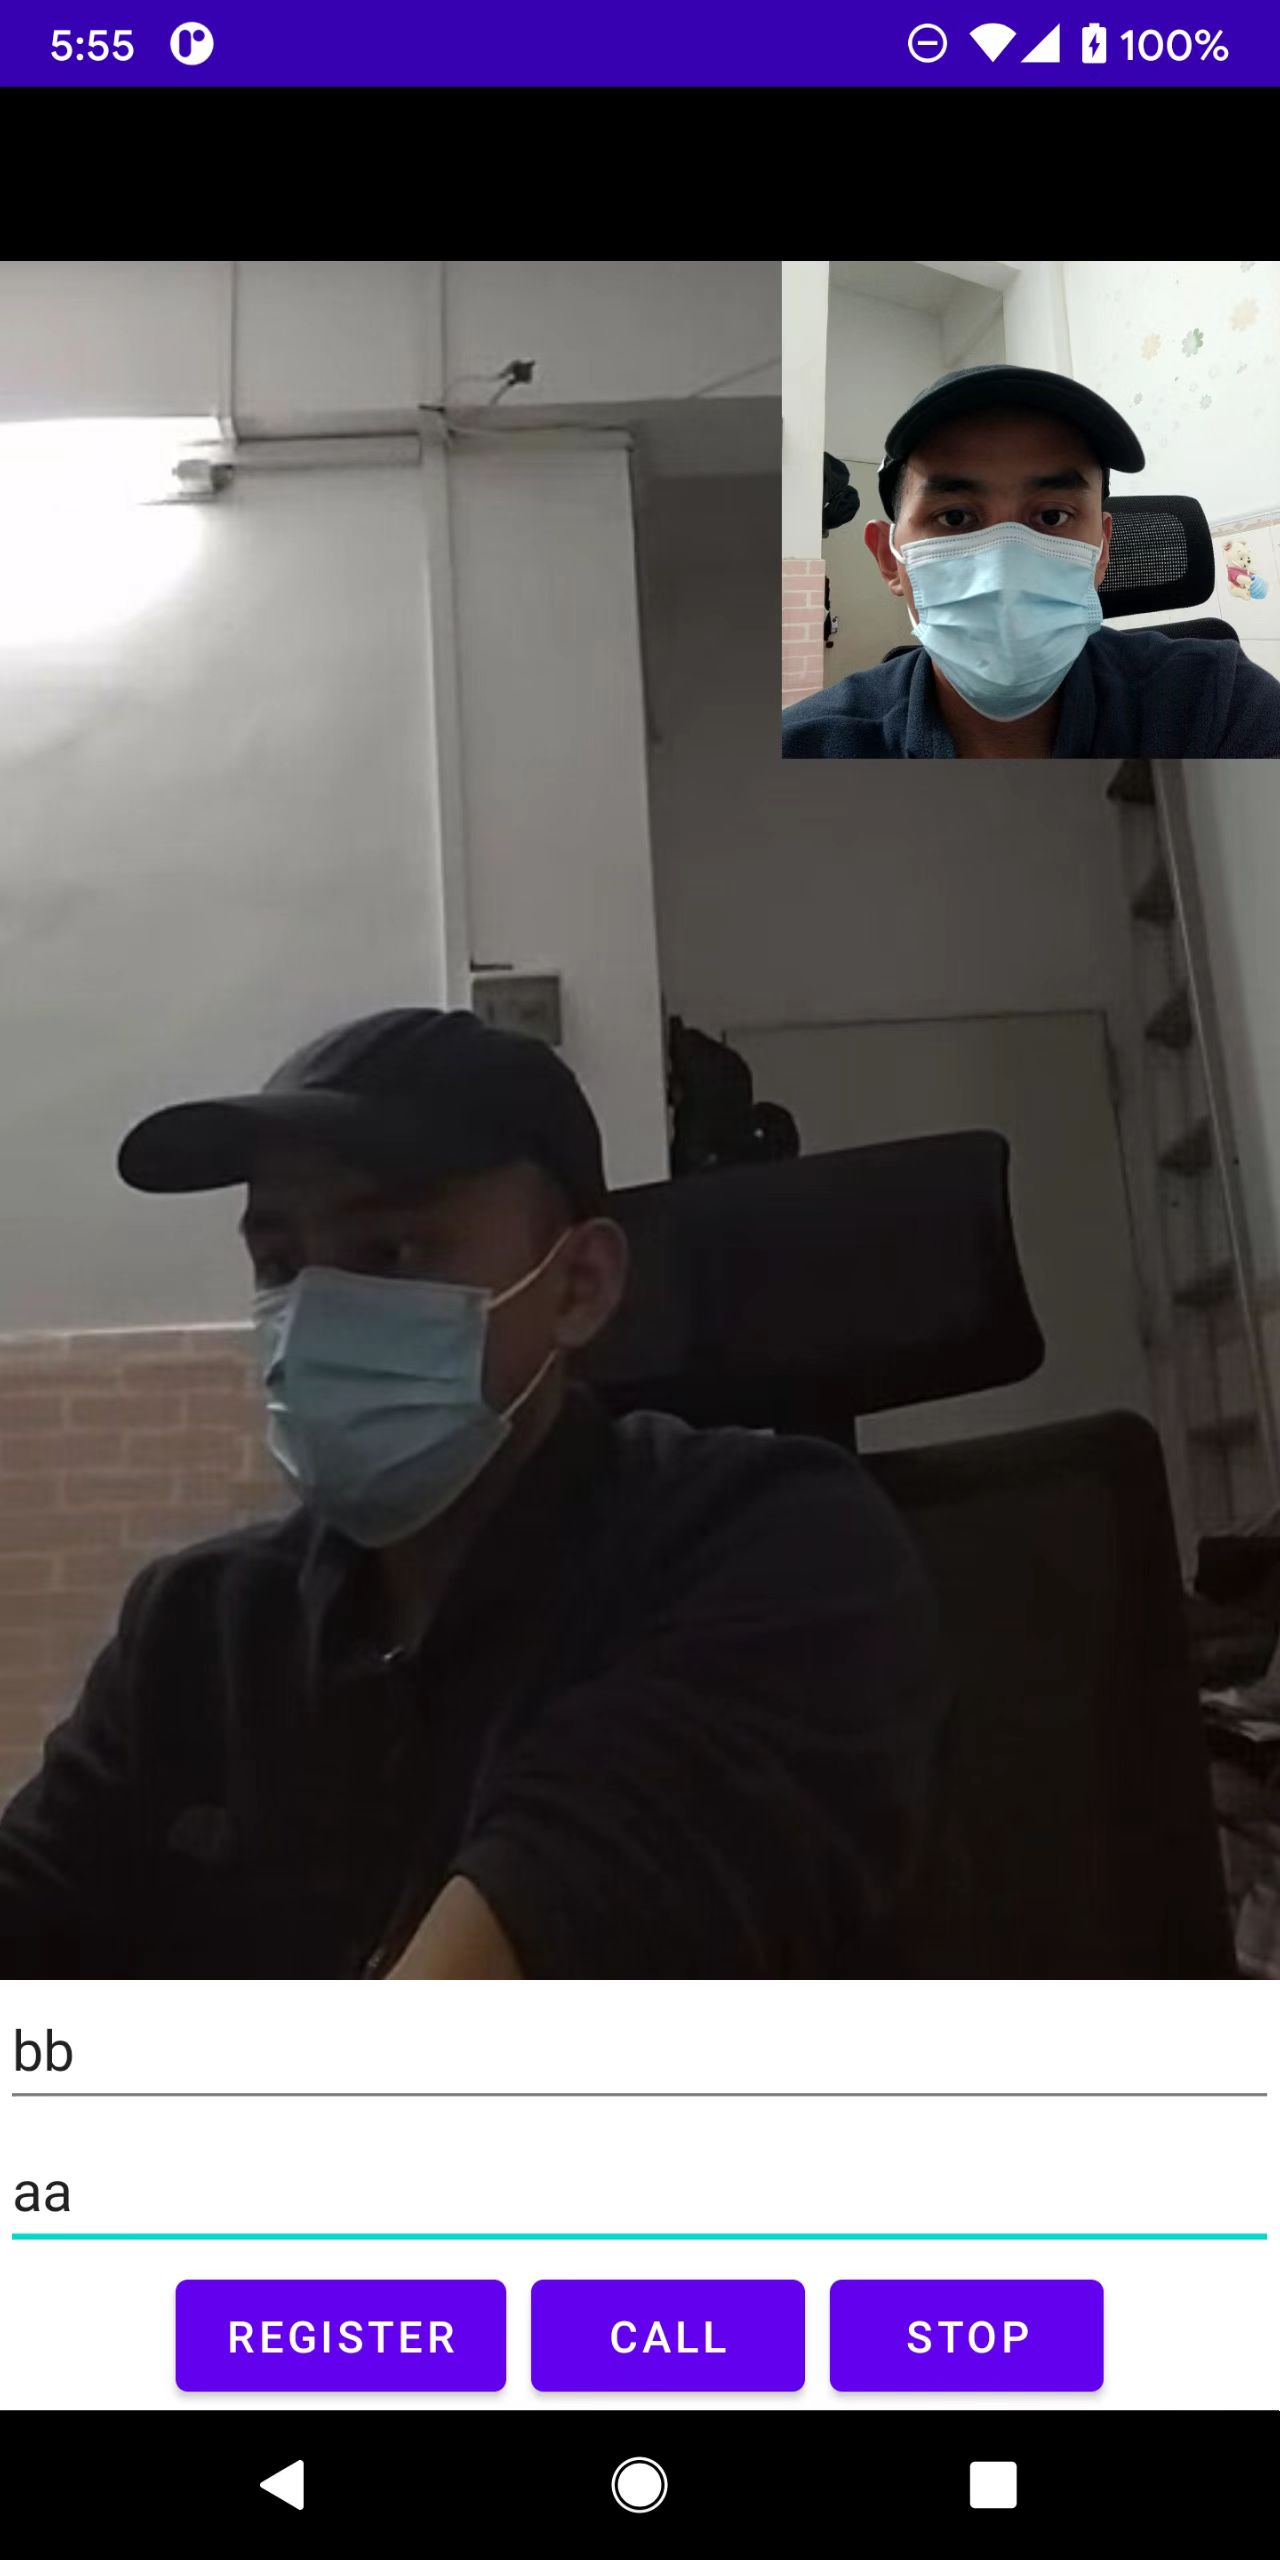
medisStream.addTrack(videoTrack)同样在onAddTrack添加远程视频流即可,以下是两个手机的测试:

评论